DIY Home Improvement: 15 Practical Projects to Upgrade Your Home on a Budget
Harry November 15, 2026 0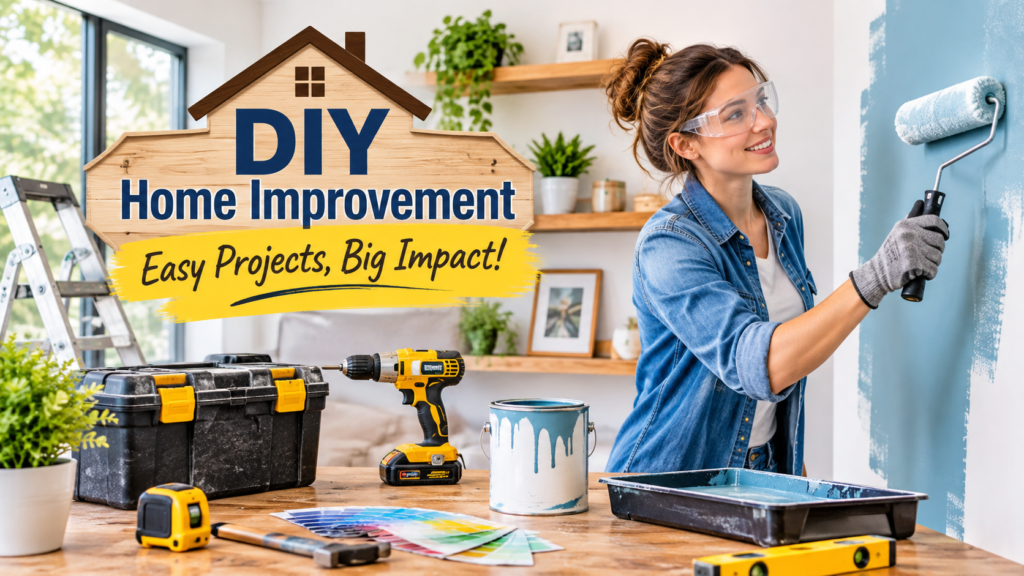
DIY Home Improvement Ideas
Improving your home does not always require an expensive renovation or a professional contractor. Many changes can be completed with basic tools, affordable materials, and a little planning. From painting an old room to installing storage shelves, small upgrades can make your home more comfortable, attractive, and useful.
DIY home improvement is a practical way to take care of your property while learning useful skills. You can update outdated spaces, fix minor problems, and make better use of the rooms you already have. However, choosing the right project is important. Some jobs are suitable for beginners, while others require specialist knowledge and professional help.
This guide covers 15 DIY home improvement projects that can help you improve your living space. You will also learn which tools to buy, how to plan your budget, and which repairs are better left to professionals.
What Is DIY Home Improvement?
DIY home improvement means making repairs, upgrades, or changes to your home yourself instead of hiring someone to complete every task. The work can include painting walls, repairing small holes, installing shelves, replacing cabinet handles, improving storage, or refreshing outdoor spaces.
Some projects are mainly decorative, while others improve the way your home works. For example, adding weatherstripping around a door can help reduce drafts, while organizing a garage can make everyday items easier to find.
The main idea is to choose work that matches your experience, available tools, and budget. You do not need advanced construction skills to make useful improvements.
15 DIY Home Improvement Projects Worth Trying
Here are practical home improvement ideas for different rooms and skill levels. Start with a small project and move to more challenging work as your experience grows.
1. Give Your Walls a Fresh Coat of Paint
Painting is one of the easiest ways to change the appearance of a room. Old paint can make walls look dirty or outdated, while a fresh color can make the space feel cleaner and brighter.
Materials you may need:
- Interior wall paint
- Paint roller and tray
- Angled paintbrush
- Painter’s tape
- Drop cloth
- Sandpaper and wall filler
How to do it:
- Move furniture away from the walls or cover it properly.
- Clean the wall and remove loose paint.
- Fill small holes and allow the filler to dry.
- Sand repaired areas until they are smooth.
- Cover edges, switches, and trim with painter’s tape.
- Apply the paint according to the manufacturer’s instructions.
Test your chosen color on a small section before painting the entire room. Remember that lighting can make the same color look different during the day and evening.
2. Replace Old Cabinet Handles
Kitchen and bathroom cabinets can look outdated even when their doors are still in good condition. Replacing old handles and knobs is a simple way to refresh their appearance.
What you need:
- New cabinet handles or knobs
- Screwdriver
- Measuring tape
- Drill, if new holes are required
Remove one old handle and check its screw spacing before buying replacements. Choosing hardware with the same spacing can save you from drilling new holes.
Install the new handles and tighten the screws carefully. Avoid overtightening, as this can damage the cabinet surface.
3. Install Floating Shelves
Floating shelves provide extra storage without taking up floor space. They can be useful in bedrooms, living rooms, kitchens, and home offices.
Steps to follow:
- Decide where you want the shelf.
- Check the wall for studs, pipes, and electrical wiring.
- Mark the mounting points with a pencil.
- Use a level to keep the shelf straight.
- Install suitable brackets and anchors.
- Attach the shelf according to the manufacturer’s instructions.
For heavy objects, secure the brackets to wall studs or use an appropriate mounting system rated for the expected load. Do not assume ordinary drywall anchors can support every shelf.
4. Update Your Bathroom Accessories
You can make a bathroom look more organized by replacing worn towel bars, toilet paper holders, hooks, and other accessories.
Choose matching finishes to create a consistent appearance. Before drilling, check for hidden plumbing and electrical lines. Use mounting hardware suitable for the wall material and follow the product instructions.
If you want to avoid drilling, consider accessories designed for suitable adhesive or suction mounting surfaces. Check their weight limits before use.
5. Refresh Your Front Door
Your front door is one of the first things visitors notice. A clean, freshly painted door can improve the appearance of your home’s entrance without requiring a full exterior renovation.
Basic steps:
- Clean the door and remove dirt.
- Check for peeling paint or damaged areas.
- Sand the surface where appropriate.
- Protect nearby glass, walls, and hardware.
- Apply a suitable primer if required.
- Add paint designed for the door’s material and exposure.
Allow the finish to dry according to the label before closing the door fully. If the door has significant damage, rot, or security problems, consider professional repair or replacement.
6. Repair Small Holes in Drywall
Small holes from picture hooks, screws, or accidental knocks can make walls look untidy. Repairing minor drywall damage is a useful skill for homeowners.
Materials needed:
- Lightweight wall filler or spackle
- Putty knife
- Fine sandpaper
- Primer
- Matching paint
Remove loose material around the hole. Apply filler with a putty knife, following the product instructions. Once dry, sand the surface gently until it is smooth. Apply primer where needed and finish with matching paint.
Large holes, water-damaged drywall, and damaged areas around electrical equipment may need a different repair method or professional inspection.
7. Add Better Lighting to Your Rooms
Lighting affects how comfortable and useful a room feels. You can improve an existing space by using brighter bulbs, adding table lamps, or placing task lighting near work areas.
Consider these options:
- Use warm lighting in bedrooms and relaxing spaces.
- Add focused lighting above desks and kitchen work areas.
- Use floor lamps to brighten dark corners.
- Choose suitable LED bulbs to reduce energy use.
- Keep light fixtures clean and free from dust.
For new wiring, circuit changes, or electrical repairs, hire a qualified electrician. Even simple-looking electrical work can create a fire or shock risk if completed incorrectly.
8. Install Weatherstripping Around Doors
Small gaps around exterior doors can allow outside air and dust to enter your home. Weatherstripping helps seal suitable gaps and can improve indoor comfort.
How to get started:
- Inspect the edges of the door.
- Clean the surface where the weatherstripping will go.
- Measure the required length.
- Cut the material according to the instructions.
- Apply or attach it around the appropriate edges.
- Close the door and check that it seals without becoming difficult to operate.
Choose a product designed for your door type. A seal that is too thick may prevent the door from closing properly.
9. Give Kitchen Cabinets a New Look
Replacing kitchen cabinets can be expensive. If the existing cabinet boxes and doors are in good condition, cleaning and repainting them may offer a more affordable update.
A simple cabinet refresh:
- Remove doors, drawers, and hardware.
- Clean grease and dirt from every surface.
- Sand and prepare the finish as required.
- Apply a suitable primer.
- Use paint designed for cabinets.
- Allow the finish to cure according to the product instructions.
- Reinstall the doors and handles.
Preparation matters more than rushing to apply paint. Grease, dust, and poor surface preparation can cause the new finish to peel or look uneven.
10. Create More Storage in Your Garage
A cluttered garage makes it difficult to find tools, sports equipment, and household supplies. Better storage can make the space more useful.
Try these improvements:
- Install wall-mounted tool organizers.
- Add shelves for storage boxes.
- Use hooks for suitable garden equipment.
- Label containers clearly.
- Keep frequently used items within easy reach.
- Store chemicals and hazardous materials safely.
Before attaching shelves or heavy storage systems, check the wall structure and use suitable fixings. Keep walkways and access to electrical panels clear.
11. Refresh Your Garden or Backyard
Outdoor improvements can make your home more enjoyable. You do not need a large landscaping budget to create a cleaner and more welcoming garden.
Start with manageable tasks such as trimming overgrown plants, removing weeds, cleaning paths, and adding suitable plants to empty areas.
You can also create a small seating corner with outdoor furniture or improve an existing space with planters. Choose plants that suit your climate, sunlight, and available water.
For major tree work, retaining walls, drainage changes, or projects involving underground utility lines, seek professional advice before starting.
12. Replace Old Showerheads
A worn or clogged showerhead can affect water flow and make a bathroom feel outdated. Replacing a compatible showerhead is often a manageable DIY task.
Basic process:
- Read the replacement product instructions.
- Protect the existing finish with a cloth.
- Carefully remove the old showerhead.
- Clean the threaded connection.
- Apply the recommended sealing material if required.
- Install the new showerhead without overtightening.
- Turn on the water and check for leaks.
If the pipe is corroded, damaged, or difficult to remove, stop rather than forcing the connection. A plumber can prevent further damage.
13. Improve Window Coverings
Old curtains and blinds can make a room feel dated. Replacing them can improve privacy, light control, and the overall appearance of your space.
Measure the window carefully before purchasing new coverings. Consider the amount of natural light, the room’s purpose, and whether you need blackout material.
For a simple update, you can also replace curtain rods or brackets. Use suitable fixings for the wall and make sure the hardware can support the weight of the curtains.
14. Refinish an Old Piece of Furniture
An old table, chair, or cabinet may still be useful even if its surface looks worn. Refinishing furniture can help you reuse something you already own instead of buying a replacement.
Steps to consider:
- Inspect the furniture for loose joints or damage.
- Clean the surface.
- Identify the existing finish.
- Prepare the surface using an appropriate method.
- Apply a suitable stain, paint, or protective finish.
- Allow enough drying and curing time.
Use appropriate respiratory and eye protection when sanding or working with finishes. If the furniture may have old lead-based paint, do not sand or scrape it until the surface has been properly assessed.
15. Improve Your Home’s Entryway
A clean entryway makes everyday life easier and gives visitors a better first impression.
You can improve this area by adding a shoe rack, wall hooks, a small bench, or a storage basket. A mirror can also make a narrow entrance feel more open.
Keep the design simple and avoid blocking the doorway. Make sure shoes, bags, and other items do not create a tripping hazard.
Essential Tools for DIY Home Improvement
You do not need to purchase every tool available at a hardware store. Begin with a small collection of useful equipment and add specialist tools only when a project requires them.
| Tool | Common Use |
|---|---|
| Tape measure | Measuring walls, furniture, and materials |
| Screwdriver set | Tightening and removing screws |
| Hammer | Basic household and woodworking tasks |
| Cordless drill | Drilling holes and driving screws |
| Spirit level | Checking shelves and fittings |
| Utility knife | Cutting suitable materials |
| Pliers | Gripping and turning small components |
| Putty knife | Applying wall filler |
| Paint roller and brush | Painting walls and surfaces |
| Safety glasses | Protecting eyes during suitable tasks |
| Work gloves | Protecting hands during handling |
For larger or occasional projects, renting a tool may cost less than purchasing equipment you will rarely use.
How to Plan a DIY Home Improvement Project
A little preparation can prevent wasted materials, unnecessary expenses, and unfinished work. Before starting, write down what you want to change and how you plan to complete it.
1. Choose a Clear Goal
Avoid starting with a vague plan such as improving the entire kitchen. Choose a specific task, such as painting the cabinet doors or replacing the handles.
A clear goal makes it easier to estimate the time, materials, and cost.
2. Check Your Skill Level
Be honest about your experience. Painting a small room is very different from installing a new electrical circuit or moving a plumbing line.
If a project involves a risk you do not understand, get professional advice before proceeding.
3. Measure the Area
Measure walls, floors, shelves, and other surfaces before purchasing materials. Write down the measurements and check them again.
Buying the wrong size can lead to extra costs and unnecessary delays.
4. Prepare a Budget
List the materials, tools, delivery charges, and other expected costs. Include a reasonable amount for unexpected expenses.
Do not assume DIY always costs less. Mistakes, replacement materials, tool purchases, and repairs can make an inexpensive project more costly than expected.
5. Read Product Instructions
Paint, adhesives, sealants, flooring, and other building products have different preparation and drying requirements.
Follow the manufacturer’s instructions rather than relying only on a video or general online guide.
6. Protect the Work Area
Cover floors and furniture, keep children and pets away from tools, and make sure the work area has suitable ventilation.
Clean up dust and debris as you work instead of leaving everything until the end.
Common DIY Home Improvement Mistakes to Avoid
Many home improvement problems happen because people rush through preparation or underestimate the work involved.
Watch out for these mistakes:
- Skipping measurements: Incorrect measurements can lead to wasted materials and poor fitting.
- Buying the cheapest materials: Low-quality products may not last or may be unsuitable for the job.
- Ignoring surface preparation: Paint and adhesive may fail when applied to dirty or damaged surfaces.
- Using the wrong tools: Incorrect equipment can damage materials and increase the risk of injury.
- Rushing drying time: Paint, filler, grout, and sealants may need specific drying or curing periods.
- Ignoring hidden problems: Water damage, mold, damaged wiring, and structural issues should not be covered up with cosmetic work.
- Taking on advanced jobs without experience: Some projects require permits, inspections, or qualified tradespeople.
A good DIY project is not simply one that looks finished. It should also be safe, durable, and suitable for the home.
Which Home Improvement Projects Should You Leave to Professionals?
Some jobs carry serious risks if completed incorrectly. A DIY tutorial does not replace the training, equipment, or legal requirements needed for specialist work.
Consider hiring a qualified professional for:
- New electrical circuits and electrical panel work.
- Gas lines and gas appliance connections.
- Major plumbing changes.
- Removing or altering load-bearing walls.
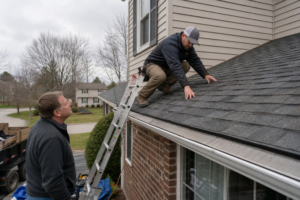
- Roof repairs involving significant height or damage.
- Structural repairs and major foundation problems.
- Work involving suspected asbestos or lead-based materials.
- Projects that require permits or inspections you are not qualified to handle.
Building regulations and permit requirements vary by location. Check with your local building department before starting regulated work.
How DIY Home Improvement Can Help Your Property
Well-planned home improvements can make your property more comfortable, attractive, and easier to maintain. Some upgrades may also make a home more appealing to future buyers.
For example, fresh paint can improve the appearance of a room, while better storage can make a small space more practical. Maintaining gutters and addressing minor water problems can also help prevent more expensive damage.
However, no DIY project guarantees a higher selling price. The result depends on the local property market, the quality of the work, the condition of the home, and buyer preferences.
Focus first on improvements that solve real problems or make your everyday living space better.
Frequently Asked Questions About DIY Home Improvement
What are the easiest DIY home improvement projects for beginners?
Painting a small room, changing cabinet handles, organizing a garage, installing suitable shelves, and repairing small drywall holes are good starting points. Choose a task that requires basic tools and has clear instructions.
How can I improve my home on a small budget?
Start with cleaning, decluttering, painting, replacing old handles, improving storage, and refreshing your entryway. These projects can change the appearance and usefulness of a space without requiring a complete renovation.
What tools should every homeowner have?
A basic home toolkit can include a tape measure, screwdriver set, hammer, pliers, utility knife, level, and suitable safety equipment. A cordless drill is also useful for many common projects.
Is DIY home improvement worth it?
It can be worthwhile when the project matches your skills and the cost of materials and tools is lower than hiring someone. However, complicated or risky work may be safer and more cost-effective when handled by a qualified professional.
Can DIY projects increase home value?
Some improvements can make a property more attractive to buyers, especially when they improve appearance, maintenance, or functionality. The actual effect on value depends on the property and local market.
How do I choose my first home improvement project?
Choose a small project with a clear result, manageable costs, and low safety risks. Painting a room, replacing cabinet handles, or organizing a storage area can be good first choices.
How much money should I spend on DIY home improvement?
There is no single budget for every project. Estimate material and tool costs before starting, compare product options, and keep some money available for unexpected expenses. Avoid beginning work that you cannot afford to complete safely.
Final Thoughts
DIY home improvement is a useful way to make your home more comfortable, organized, and attractive without paying for professional help for every small task. Projects such as painting walls, installing shelves, updating cabinet handles, improving storage, and refreshing outdoor areas can make a noticeable difference.
The best approach is to start small, plan your spending, use the right tools, and follow product instructions. Do not rush into electrical, gas, structural, or other specialist work just to save money.
Choose one improvement that solves a real problem in your home. Complete it carefully, learn from the experience, and use those skills when planning your next project.